How to Setup Domain Pointers - Domain Management
Before you proceed, please ensure that you have an active domain associated with your account. You can add one by purchasing a domain or transferring an existing domain.
Please see the articles below for the detailed steps:
- How to Purchase a Domain - Domain Registration
- How to Transfer A Domain to Your Account - Domain Transfers
It is also important to know where your files are located. It will be useful for the next procedures.
Protect your domain and personal information with Domain Privacy + Protection. It’s the fast, easy, and affordable way to keep competitors, salespeople, and thieves from accessing your domain and personal information.
Once you have an active domain (or if you already have an active domain) associated with your account, please follow the steps below:
How to Manage Domain Pointers
- Log in to your Account Manager.
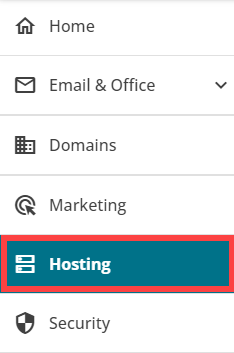
- Click Hosting on the left-hand menu.
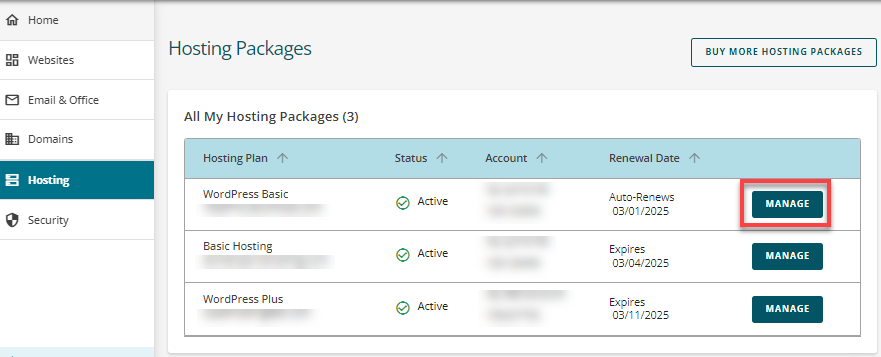
- Search for the hosting plan where your domain is currently pointed (connected), and then click its Manage button.
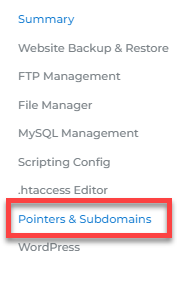
- Click Pointers & Subdomains in the left-hand menu.
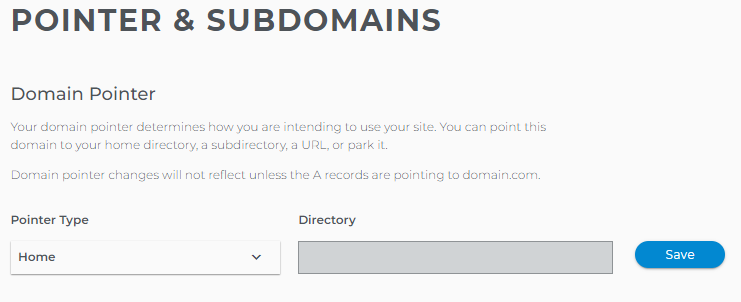
- Select your Pointer Type from the drop-down menu.
- Home - This setting causes your domain to point to the main directory of your hosting account. This pointer type is best when there are no other domain names on file and the website files are placed in the home directory.
- Select Home to automatically point the domain to the Home Directory. Most of the time, the /public_html/ or "/" are used to denote the root folder.
- Click Save.
- Select Home to automatically point the domain to the Home Directory. Most of the time, the /public_html/ or "/" are used to denote the root folder.
- Subdirectory - This setting allows you to designate a specific subdirectory to which your domain should be pointed. This pointer type is recommended if your hosting account contains multiple folders and domain names.
- Within your Account Manager, navigate to your File Manager section.
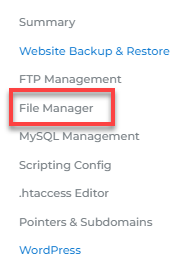
- Locate your file and take note of the folder name (directory name).
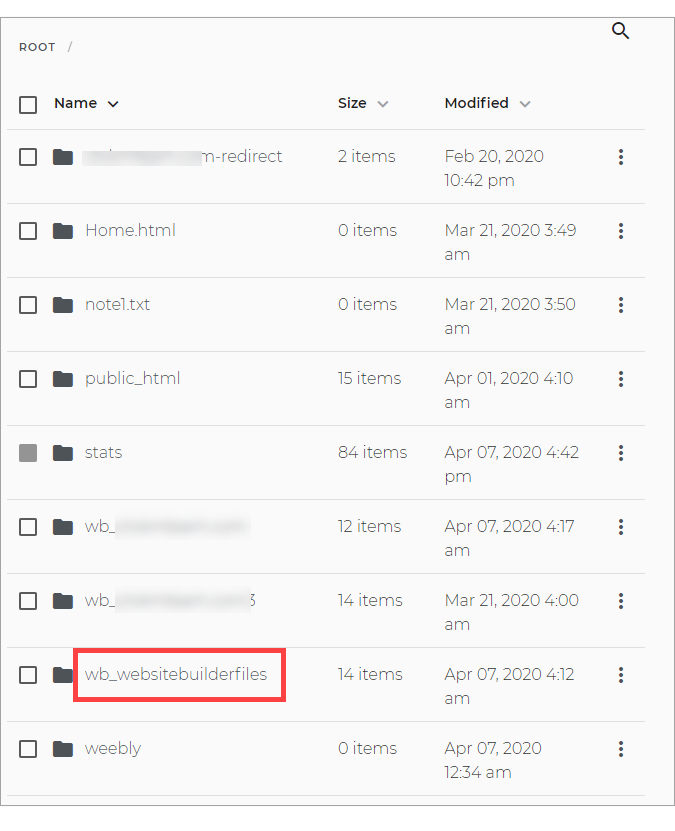 Default folder names relate to the builder used and the name of the domain. For example, "wb_" is for Website Builder, "w_" is for Weebly, and "wp_" is for WordPress. In this case, the builder used is Website Builder, and the user has changed the folder name.
 - Navigate back to the Pointers & Subdomain page and select Subdirectory in the Pointer Type drop-down menu.
- Enter the folder name in the Directory field.
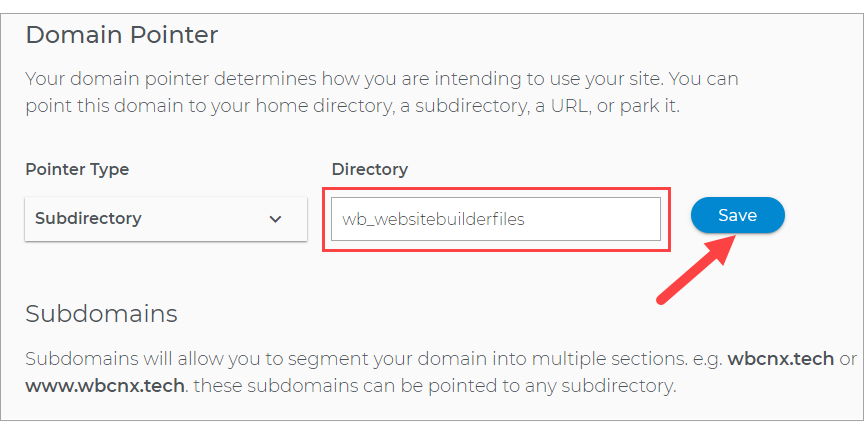
- Click Save.
- Within your Account Manager, navigate to your File Manager section.
- URL Standard - This setting allows you to designate an outside URL address to point to your domain. Any incoming traffic to this domain will redirect to the designated URL. The URL in your visitor's address bar will change from your domain to the appointed URL.
- Select URL Standard from the Pointer Type drop-down menu.
- Place the full URL of the website to which your visitors would like to be redirected.
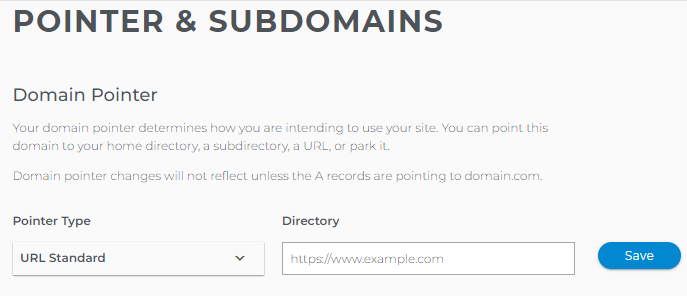
- Click Save.
- URL Stealth - This setting behaves exactly like the URL Standard. However, when redirecting to the new URL, visitors will see your domain in their address bar.
- Select URL Stealth from the Pointer Type drop-down menu.
- Enter the full URL of the website to which your visitors would like to be redirected.
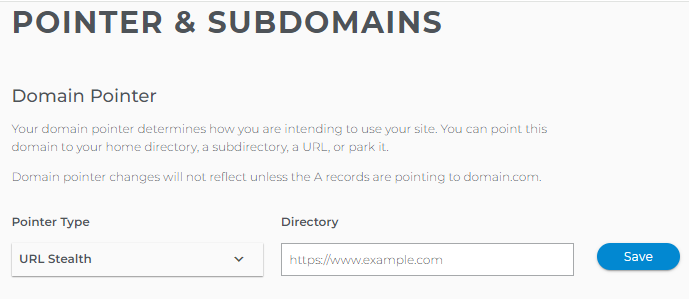
- Click Save.
- Park - This setting points your domain to a generic 'parked' page. This parked page has an 'Under Construction' notice as well as various links generated by a third party (the links generally hold some relevance to your domain name). This will not delete your website files.
- Select Park from the Pointer Type drop-down menu.
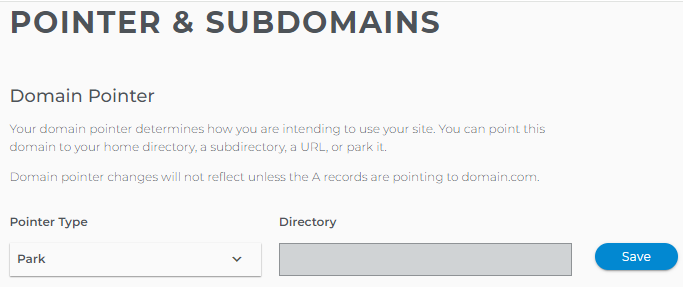
- Click Save.
- Select Park from the Pointer Type drop-down menu.
If you wish to discontinue redirecting your domain to an outside URL, please switch to either Home Directory or Park page pointer types instead. Updating the Domain Pointer takes effect instantaneously.
Other Terminologies
- Root directory - This is the directory at the highest level of a hierarchy, located at the topmost folder in the directory.
- Home Directory - The directory or folder where the user can store all their personal information, files, login scripts, and user information.
- URL address - This is the address of a website.