Community Directory
What is Community Directory
Community Directory is an opt-in directory for sites registered with us. There are many benefits to listing your site within the Community Directory:
- More links to your site (search engine optimization benefit)
- Promotion of your site to thousands of visitors to us
- Ability to control all aspects of your listing - keywords, listing categories, and listing description
- Easy listing management tools
- Listing clickthrough statistics
List your site in the Community Directory listing
To list your site with the Community Directory, first, you must purchase a listing. Remember, that if you list your site in different categories, each one counts as a separate listing.
- To purchase additional listings click here.
To create a listing for your site:
- Go to Community Directory Listing. If you purchase an additional listing, you are brought to the Manage Your Listings page.
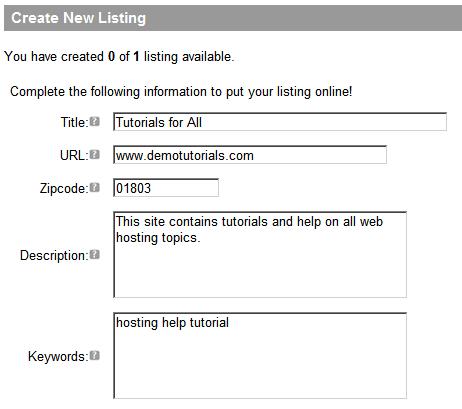
- Complete the following fields:
- Title - Enter the title of your site
- URL - Enter the URL for your site
- Zipcode - If your listing is geographically sensitive (e.g. plumbing services or pizza delivery), please provide a zip code for geocoding capabilities.
- Description -Enter a 3-5 sentence description of your site in plain text, no HTML. This description will display as part of your listing. For example:
Innovative knitting patterns and designs for babies and toddlers. Patterns are intended for beginner to intermediate knitters.
- Keywords - Enter 5-10 keywords, separated by spaces (i.e. keyword1 keyword2 keyword3) that visitors would use to search for your listing. Your keywords will not display as part of your listing.
- Select a category for your listing. If you select more than one category, each one counts as a separate listing.
- Click Add New. A Category Selection dialog opens so you can select the category for your listing.
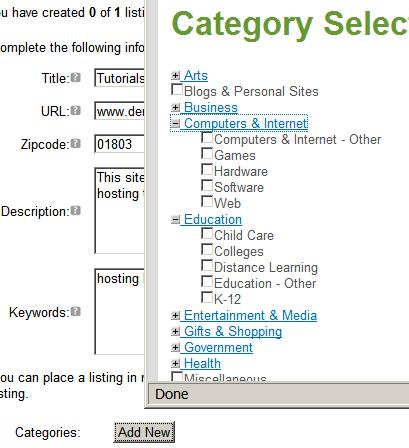
- Expand the main categories to find the category that most precisely describes your listing.
- Select the category or categories for multiple listings, then click Add Selected Categories (bottom of the dialog)
- Click Add New. A Category Selection dialog opens so you can select the category for your listing.
- All the categories you selected will show in the listing page

- In the example above, 3 categories have been selected, which would create 3 separate listings.
Note: If you have purchased fewer listings than the categories selected, you will not be able to save your listing. - Select Save Listing
- Your listing is saved to the Community Directory and appears in your Manage Listings. page.
- From here, you can Edit, View, or Delete your listing.
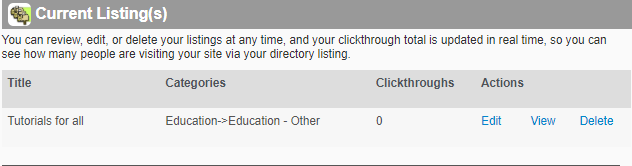
Manage your Community Directory listing
To edit, delete, or view your listings:
- Go to the Manage Listings.
- Select the option you wish - Edit, View, or Delete - next to the listing you wish to modify.
Categorize your listing when no existing category applies
If no existing category adequately describes your listing, place your listing under the Miscellaneous category. Miscellaneous listings are subject to future recategorization. We constantly work to improve our directory taxonomy, and we may create new categories in the future that would be appropriate for your listing.
Request additional categories or subcategories
Please contact our support team to request additional categories or subcategories.'
Search Community Directory listings
To search the Community Directory listings:
- Enter your terms in the search box
- Do not include commas or other delimiters between search terms, use spaces instead. For example, enter your search terms like this: knit crochet baby patterns
See LocalLift