SiteLock: How to Enable SiteLock TrueShield and TrueSpeed
This article is part of our series on getting started with SiteLock. For other articles and helpful tips on activating and using SiteLock services, please see the following articles:
- SiteLock: How to Get Started
- What to do when SiteLock Finds a Vulnerability
- How to use SiteLock TrustSeal
- Verifying Account and Domain Information in SiteLock
- SiteLock Overview and Resources
- SiteLock Free Scan FAQ
TrueShield and TrueSpeed are available on all SiteLock plans. These solutions simultaneously protect your website from malicious traffic and deliver your content to legitimate visitors faster via a Content Delivery Network (CDN) that uses servers around the world.
If you have purchased SiteLock, we highly recommend ensuring that TrueShield and TrueSpeed are properly configured. You may activate this feature in 4 main steps:
- Access your SiteLock Dashboard.
- Activate TrueShield and Get Your New DNS Records.
- Update Your Website DNS.
- Update Your MX Record.
Access your SiteLock Dashboard
-
Log in to your Domains Dashboard.
- On the dashboard, select the domain where you have SiteLock installed.
There are two views in the Domains dashboard - the Card and List views. Click on the view icons to switch to your preferred view.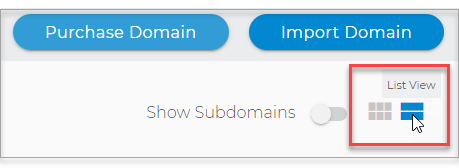
- Choose the domain you wish to modify.
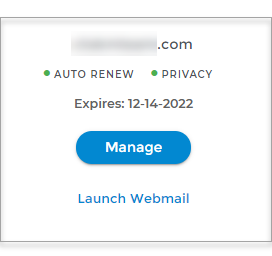
In the Card view, click the domain's Manage button.
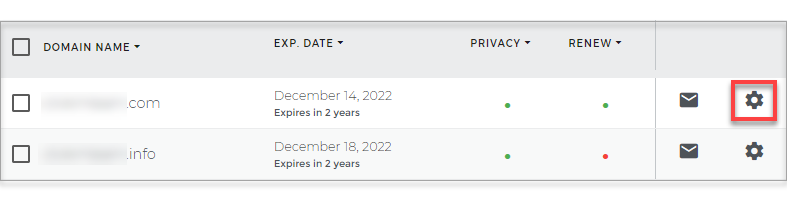
In List view, click the domain or its gear icon on the right-hand side.
- On the left pane, click on SiteLock, under Security.

- To launch your SiteLock Dashboard, click VIEW SITELOCK DASHBOARD.
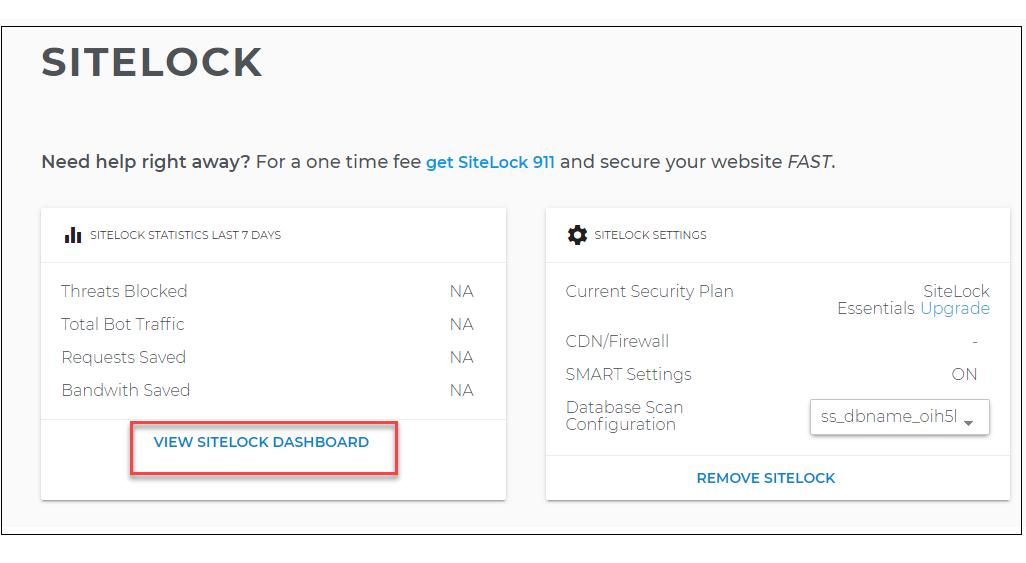
- You will be directed to your SiteLock Dashboard.
Activate TrueShield and Get Your New DNS Records
- From your SiteLock Dashboard, scroll down and look for the TrueShield dashlet.
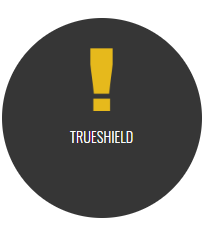
- Hover over the dashlet and click it.
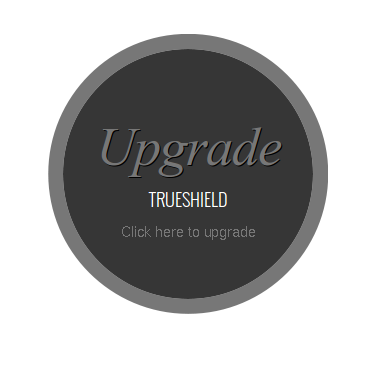
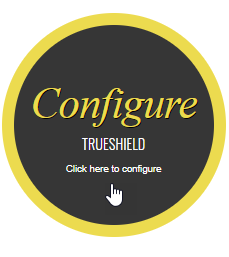 If the TrueShield dashlet says Upgrade instead of Configure:
- Click the Upgrade TrueShield icon:
- You may click “SiteLock TrueShield: Basic Free!” to obtain the free TrueShield and TrueSpeed feature included in all plans.
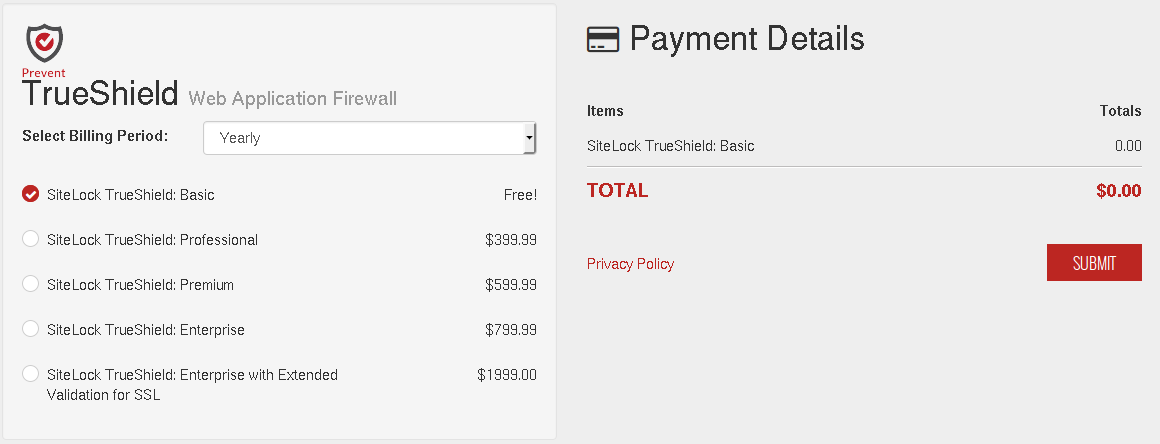
- Click Submit.
- Click the Upgrade TrueShield icon:
- If your site has SSL and you have SiteLock Trueshield Professional or higher, click Step 1 to allow SiteLock to detect your site’s SSL. SiteLock will provide you with a TXT record to apply in Domains Dashboard if you have done this. Once you have added the TXT record in Domains Dashboard, it may take up to 24 hours for SiteLock to add the site to their SSL. If, for any reason, this step has not been completed within 24 hours, please contact the SiteLock support directly at 877 563 2832.
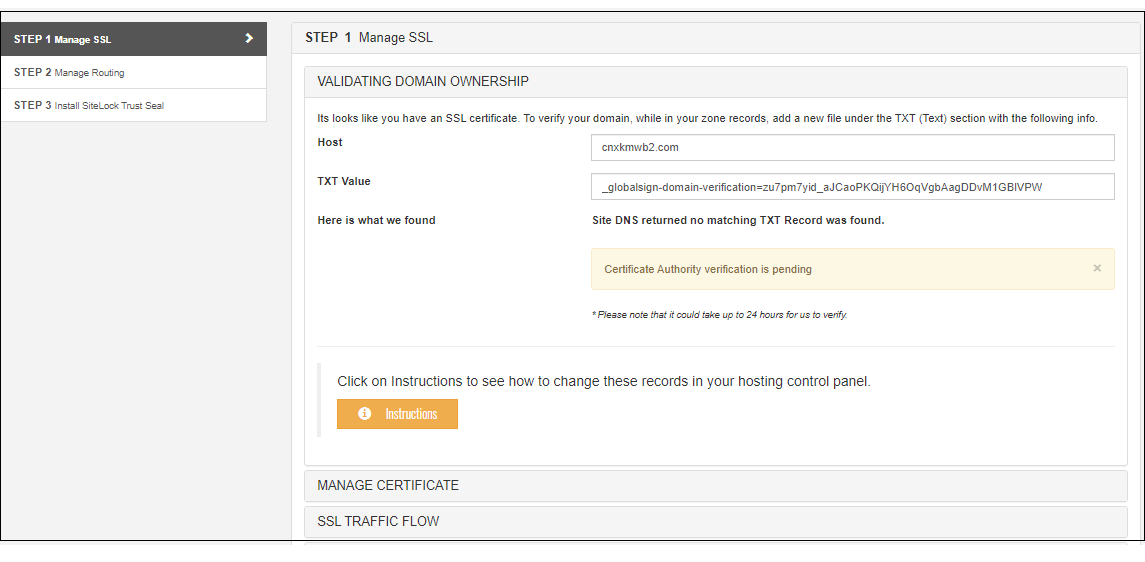
- If you need the numbered steps, please click +.
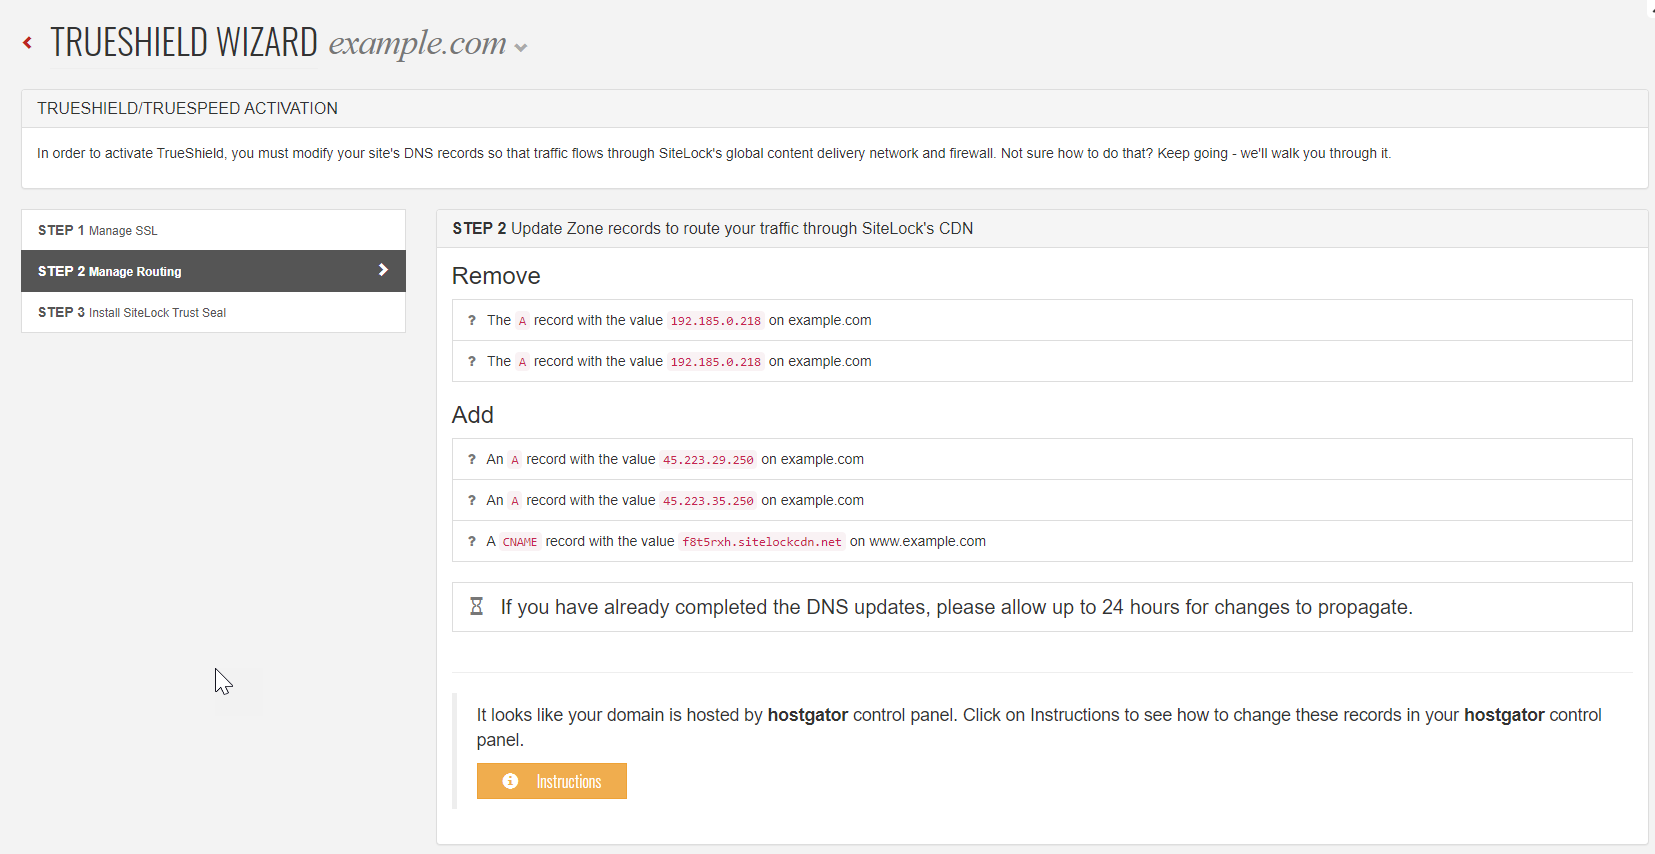
- You will then be presented with 3 steps. If you have not upgraded TrueShield to include SSL, click Step 2. Step 1 will not be covered in this tutorial.
- SiteLock will provide you with DNS records to Remove and to Add in Domains Dashboard in Step 3.
Back to top
Update Your Website DNS
To update the DNS records for your domain:
-
Log in to your Domains Dashboard.
- On the dashboard, select the domain where you have SiteLock installed.
There are two views in the Domains dashboard - the Card and List views. Click on the view icons to switch to your preferred view. - Choose the domain you wish to modify.
In the Card view, click the domain's Manage button.
In List view, click the domain or its gear icon on the right-hand side.
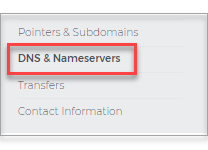
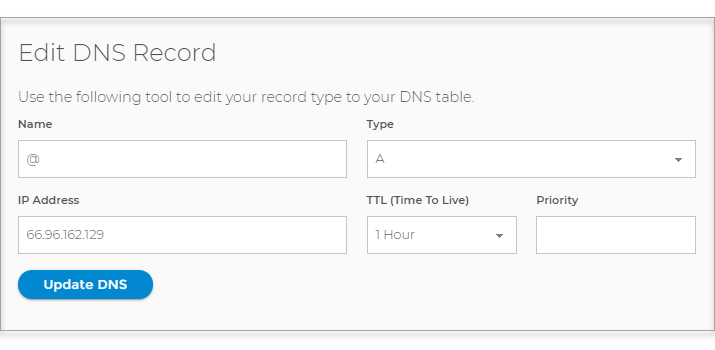
- Click on DNS & Nameservers in the left-hand menu.
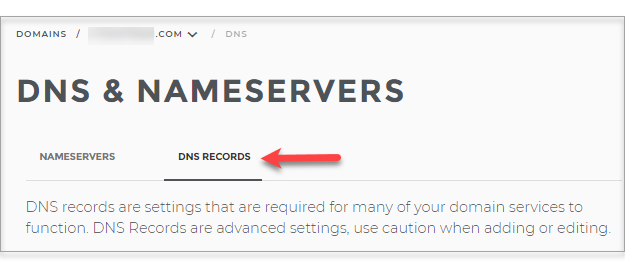
- On the DNS & Nameservers page, select the DNS Records tab.
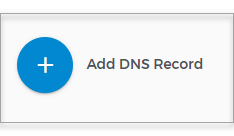
- Add a new A Record by clicking the blue + button.
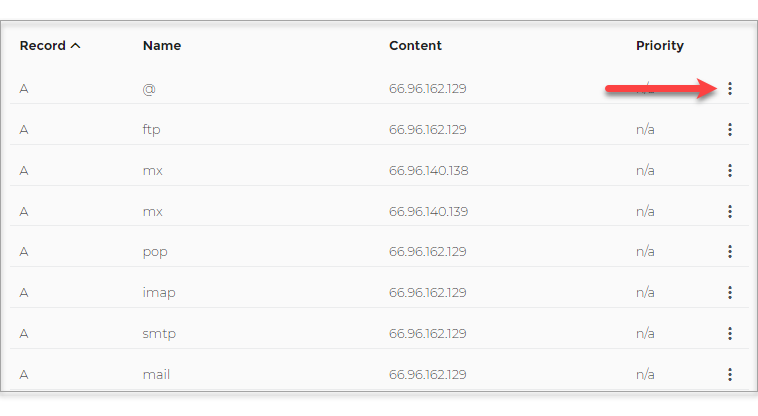
- Or, click the three dots next to the A record you wish to edit or delete.
- Make your revisions and Click on Update DNS.
Back to top
Update Your MX Record
MX records are often modified to utilize a different email service than your hosting provider or to designate personal servers as mail backups in case the default mail options fail.Here are the steps on how to update your MX records:
-
Log in to your Domains Dashboard.
- On the dashboard, select the domain where you have SiteLock installed.
There are two views in the Domains dashboard - the Card and List views. Click on the view icons to switch to your preferred view. - Choose the domain you wish to modify.
In the Card view, click the domain's Manage button.
In List view, click the domain or its gear icon on the right-hand side.
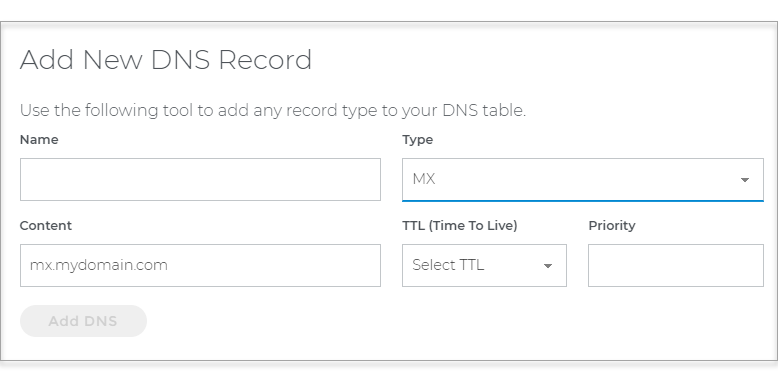
- On the left sidebar, click on DNS & Nameservers.

- On the DNS & Nameservers page, select the DNS Records tab.

- Add a new A Record by clicking the blue + button.

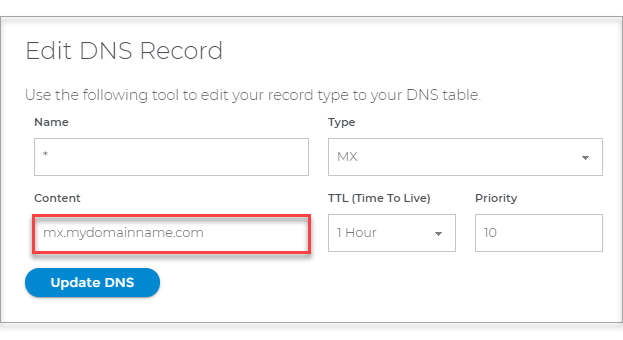
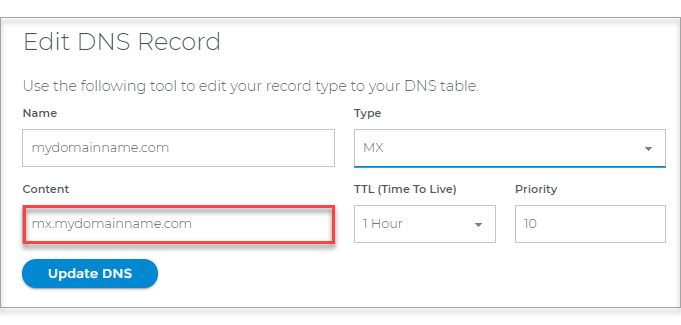
- In the window that appears, select MX record type from the dropdown list.
- Type in the MX record value in the content field.
- Then click on the Add DNS button.
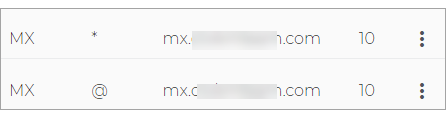
- Or, click the three dots on the MX record you wish to edit or delete. Make sure to update both MX Records with the right format.
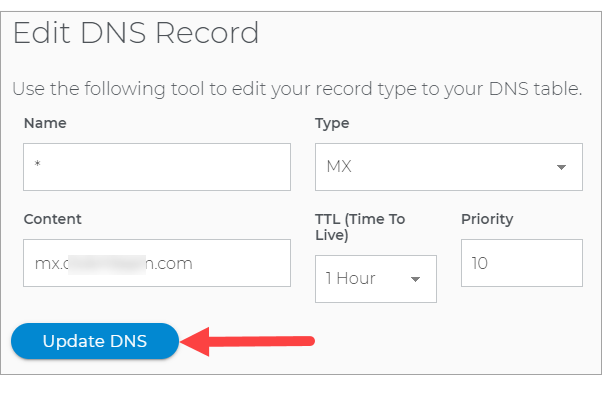
- Make your revisions and Click on Update DNS. Note: Before updating MX Records, use these tools to verify where the domain’s MX record is currently resolving, before making changes: DIG or WHOIS
MX Record Format
If NameServers are with us, then follow these two formats for the two MX Records. Make sure to change the word "domainname" with your actual domain name.


If NameServers are pointing elsewhere, you will need to contact where the NameServers are pointed in order to get this change made. You can provide these formats so they can easily point the MX Records to us. Make sure to change the word "domainname" with your actual domain name and the "brandname" with the hosting provider name like hosting.com.
If you have questions or require further assistance, you may also reach us at 844-589-5311. Our friendly security specialists will be more than happy to assist you.